Configuring the Eclipse IDE (Juno 4.2)
Before installing and configuring the Eclipse Yocto Plug-in, you need
to configure the juno 4.2 Eclipse IDE. Follow these general steps:
- Start the Eclipse IDE.
- Make sure you are in your Workbench and select "Install New Software" from the "Help" pull-down menu.
- Select “Juno - http://download.eclipse.org/releases/juno” from the "Work with:" pull-down menu.
- Expand the box next to "Linux Tools" and select the "LTTng - Linux Tracing Toolkit" boxes.
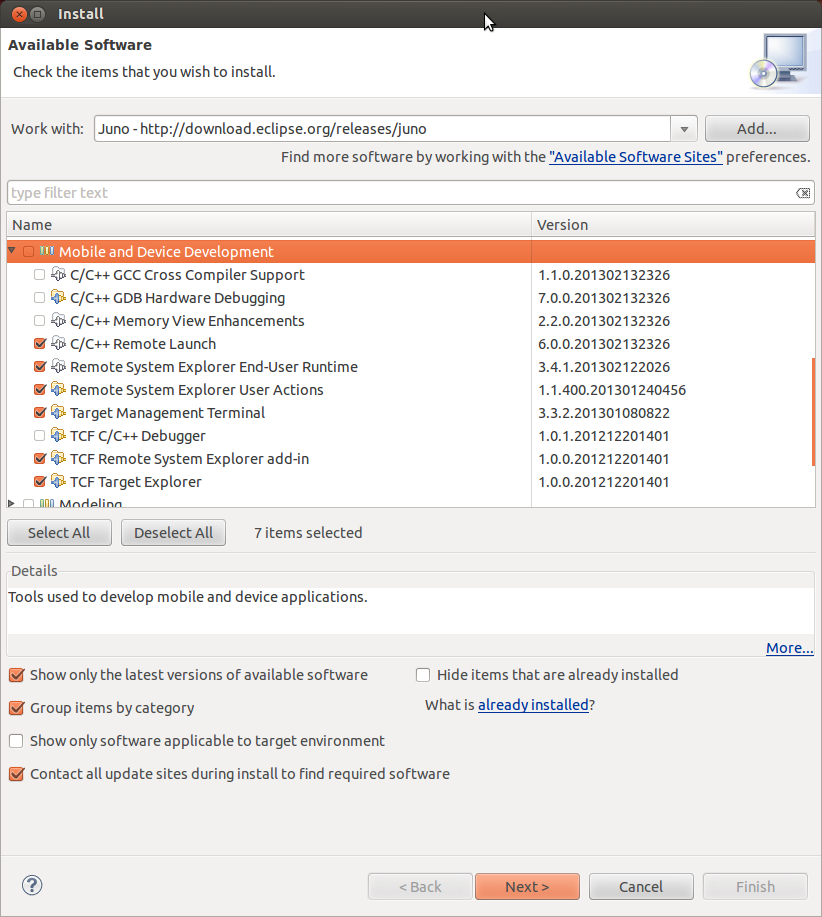
- Expand the box next to "Mobile and Device Development" and select the following boxes as shown in Figure below:
- C/C++ Remote Launch
- Remote System Explorer End-user Runtime
- Remote System Explorer User Actions
- Target Management Terminal
- TCF Remote System Explorer add-in
- TCF Target Explorer
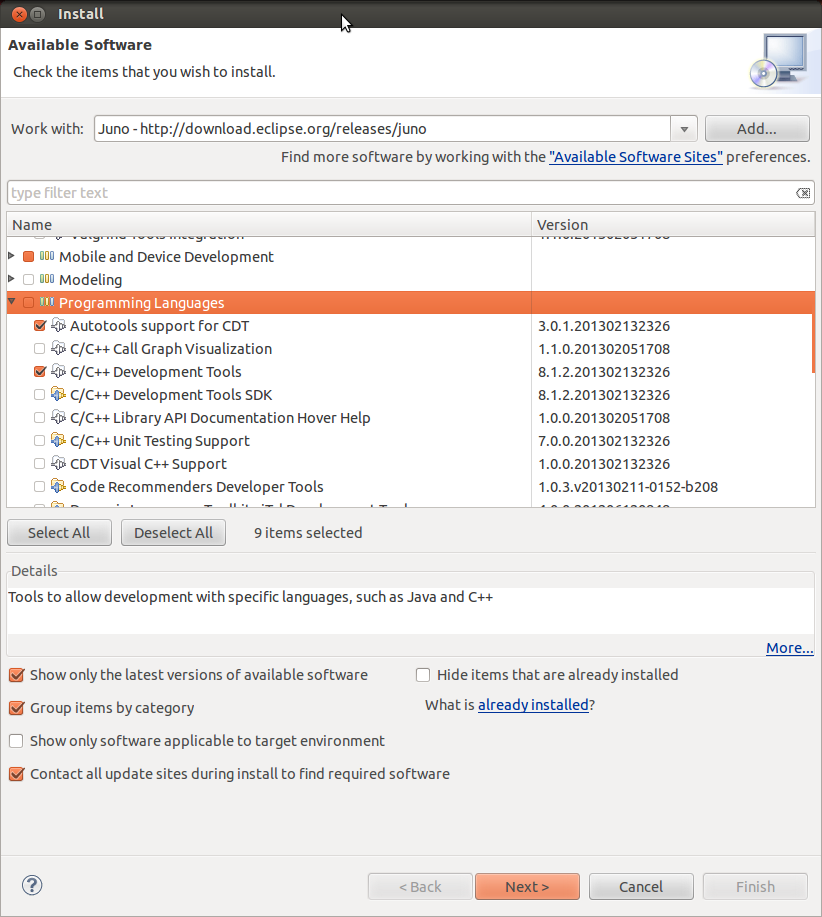
- Expand the box next to “Programming Languages” and select the “Autotools Support for CDT” and “C/C++ Development Tools” boxes as shown in figure below.
- Complete the installation and restart the Eclipse IDE.
Installing Yocto plugin for Eclipse
To install the Eclipse Yocto Plug-in from the update site, follow these steps:
- Start the Eclipse IDE.
- In Eclipse, select “install New Software” from the “Help” menu.
- Click “Add…” in the “Work with:” area.
- Enter the following URL in the URL field and provide a meaning name in the “Name” field
http://downloads.yoctoproject.org/releases/eclipse-plugin/1.3
- Click “OK” to have the entry added to the “Work with:” drop-down list.
- Select the entry for the plug-in from the “Work with:” drop-down list.
- Check the box next to “Development tools and SDKs for Yocto Linux”.
- You will get a security warning similar to the following. Please accept and complete the remaining software installation steps.
    “You are installing software that contains unsigned content. The authenticity or validity
    of this software cannot be established. Do you want to continue with the installation ?”
- Restart the Eclipse IDE to finish the installation of the plug-in.