Server initialization
Instantiate the component
The first step for starting the server is installing the corresponding deployment package in the Packages section of ESF web UI.
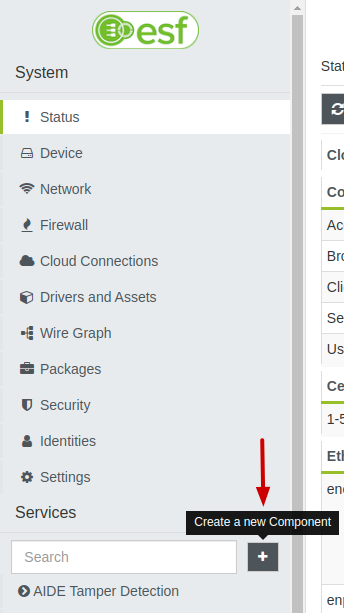
The second step involves creating at least one component instance, this can be done by clicking on the + button in the left column of the web interface, next to the search bar.
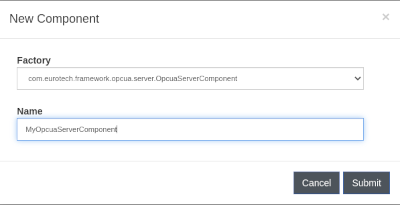
In the drop-down menu, select com.eurotech.framework.opcua.server.OpcuaServerComponent and assign a unique name to the new component.
If the instantiation of the component goes as expected, a new entry should be present in the services table under the searching text box, whose name is the one assigned to server in the previous pop up.
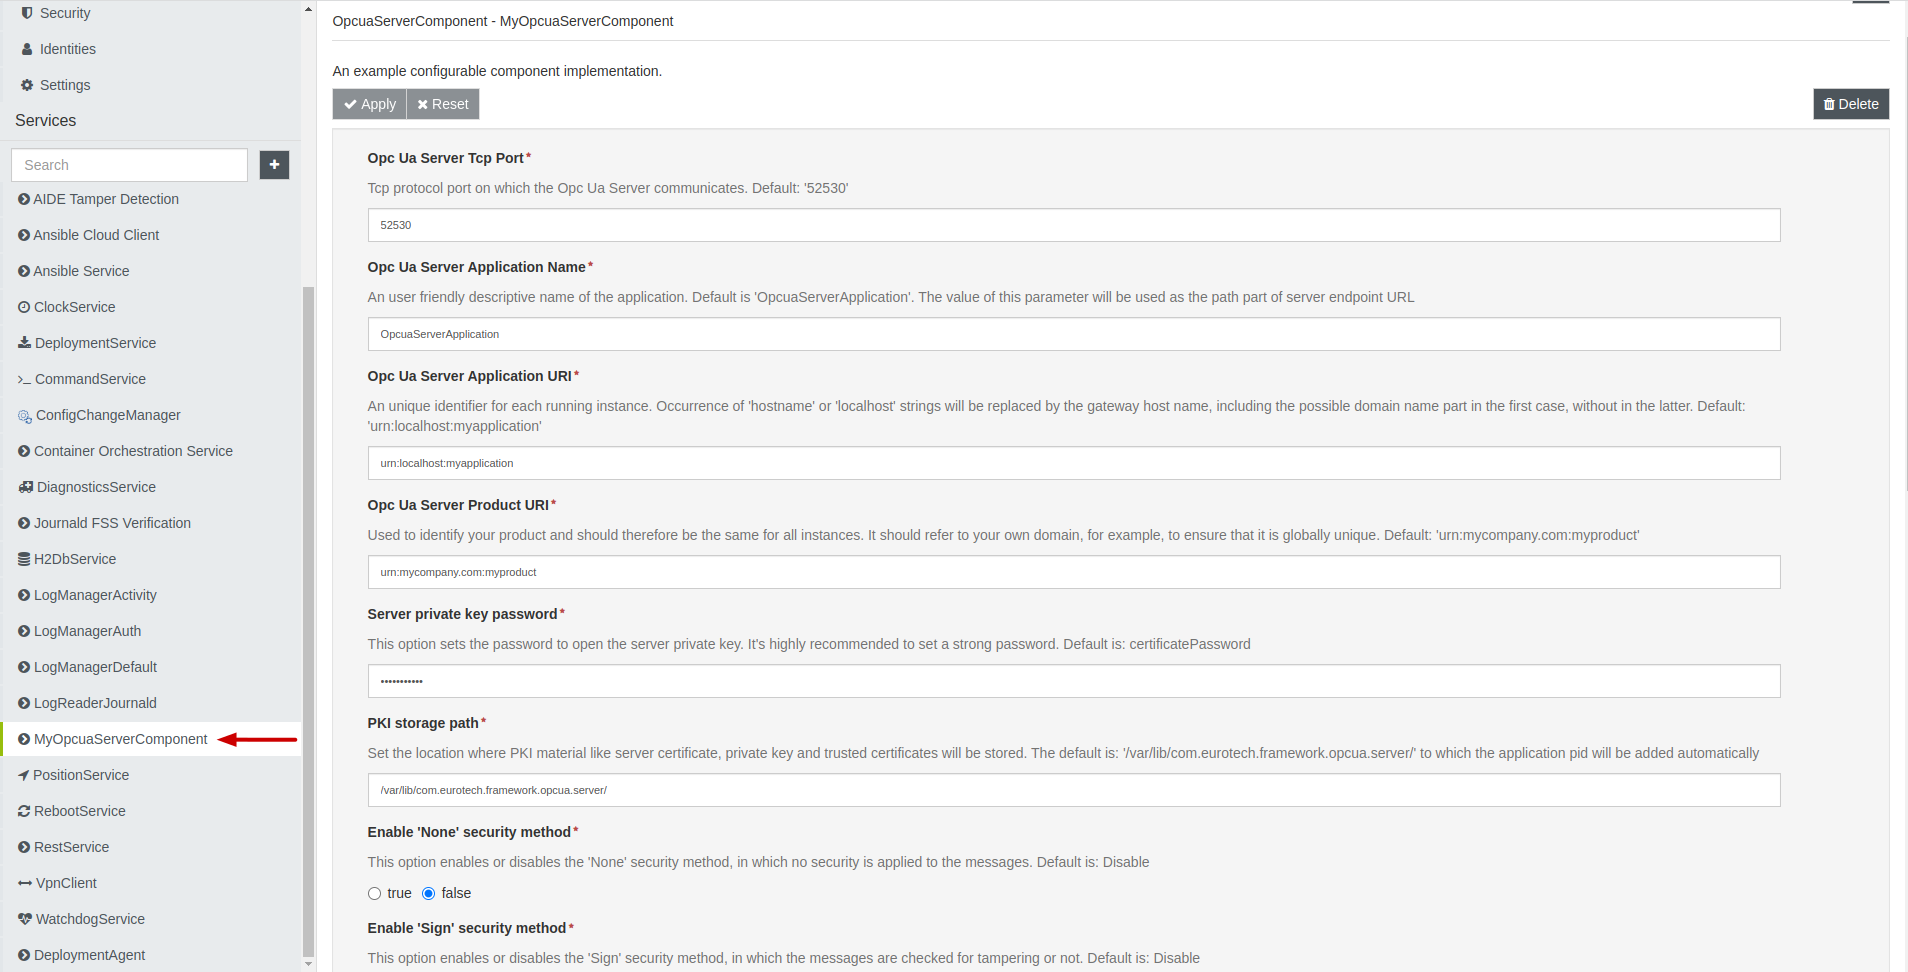
The image above shows the configuration page that can be reached by clicking on the name of the server component. Immediately after creation, the new component will print a message in framework log reporting that server startup has failed.
This is due to the fact that in the default configuration all of the security related options are disabled, this is intended to force the user to explicitly review them before server startup.
Server Settings
Now the user can decide which is the configuration that best fits with its necessities. Below is an example of how to set up the server correctly and make it accessible to customers from outside.
Standard Options
Regarding the general connectivity parameters, the server can be customized as followed:
- Opcua Server Tcp Port :
52530(Remember to add the port in the firewall section of the web interface) - Opcua Server Application Name :
OpcuaServerApplication - Opcua Server Application Name:
urn:localhost:myapplication - Opcua Server Application Uri:
urn:mycompany.com:myproduct - Opcua Server Organization Name :
MyOrganization - Path to the NodeSet2 xml file for model loading :
/home/user/CustomServer.xml(Hypothetical path for an xml file in the NodeSet2 standard)
With these options, the final address of the server will be:
opc.tcp://
machine_name:52530/OpcuaServerApplication
Which can be translated into:
opc.tcp://
hostmachine_ip_address:52530/OpcuaServerApplication
To test read/write operations with clients, it is necessary to configure the server to expose some variable nodes. This can be done by providing the server with a model in the NodeSet2 standard. The NodeSet2 XML file must be copied to the gateway and its path must be specified using the Path to the NodeSet2 xml file for model loading configuration parameter.
For simplicity you can use the xml file CustomServer.xml. This model contains two variables of types Int32: one with a default value of 123456, the other without any default value (null).
This is the basic setting of the server, regarding the connectivity parameters. However, the server cannot start until the security options are modified.
Security Options
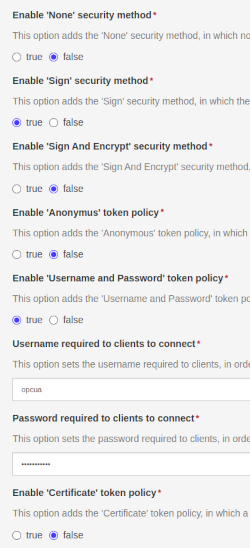
As said in previous sections, the server's security options are all set to "disabled" by default, so the server will not start at component initialization: the server will not start until at least one security method and one user token are enabled.
For the purpose of this example, the Sign security method and the User and Password token enabling is sufficient: as a consequence, a client will need to provide the correct username and password, along with a signing method of type Sign to succesfully connect to the server.
Regarding the certificates' options, let's suppose that the default settings are left as they are:
- Server private key password:
certificatePassword - PKI storage path:
/var/lib/com.eurotech.framework.opcua.server/
So the final PKI storage will be: /var/lib/com.eurotech.framework.opcua.server/OpcuaServerApplication/
After applying the new options, the server should start correctly.
Trusting Clients
Before moving to the client settings, it is necessary to explain how the server trusts the clients' certificate: by default, whenever a client tries to access the server for the first time with an untrusted certificate, the latter rejects it. This happens because it is supposed that the validation must be done by the server owner, so avoiding automatic trusting of new clients.
So, also in this example, if a client correctly contacts the server using the appropriate security policies but with an untrusted certificate, the server will close the connection and save the client certificate under the rejected folder. For this reason, if the user tries to read/write some nodes, the operation will fail.
To trust the client, the user must manually move the certificate from the rejected to the trusted folder: this simple operation will allow the client to correctly access the server and all the read/write operation. It is important to highlight that in this case the rejected/trusted folders are the ones under /var/lib/com.eurotech.framework.opcua.server/OpcuaServerApplication/__rejected__or__trusted path, while it would be /var/lib/com.eurotech.framework.opcua.server/OpcuaServerApplication/users/__rejected__or__trusted if the clients tried to connect with the certificate user token.
Read/Write Testing
Now the configuration is completed, and a customer should be able to access the server and read or write the variable nodes just created through the NodeSet2 xml file loading. In the next section, an example of communication between the server and a client (in the form of a OPC UA Driver) will be presented.