Hardening
Tip
Hardening might not be available for your account if the system administrator restricted this option.
The hardening section of the wizard consists of 4 key areas that users must complete to setup a properly hardened, IEC 62443-compatible system:
- SSH configuration: configure the Linux SSH service for secure device access
- Operating System (OS) services: enable or disable systemd services
- Everyware Software Framework (ESF): setup the Everyware Software Framework with a secure configuration
- System users: manage system users (ESF identities and Linux users) and their access credentials
SSH configuration
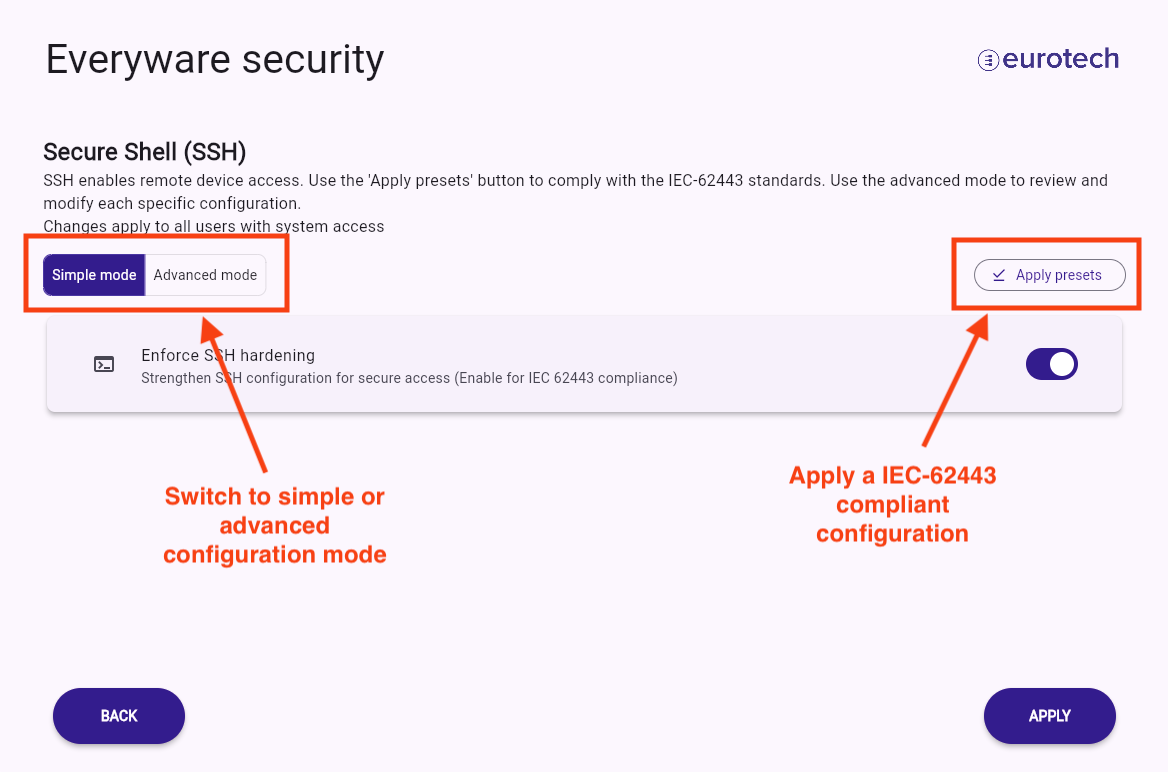
The SSH Configuration section allows users to adjust the SSH service options on the target system.
In this page, users can enable the service and customize the SSH banner (a default entry is provided). During the onboarding process, the user can configure this service using a preset compatible with the IEC-62443 specification (see image below) or by activating the SSH hardening in Simple mode. Users can further customize the service by switching to Advanced mode. The simple/advanced mode toggle and the apply presets button can be found in the header section of the screen, as shown in the picture below.
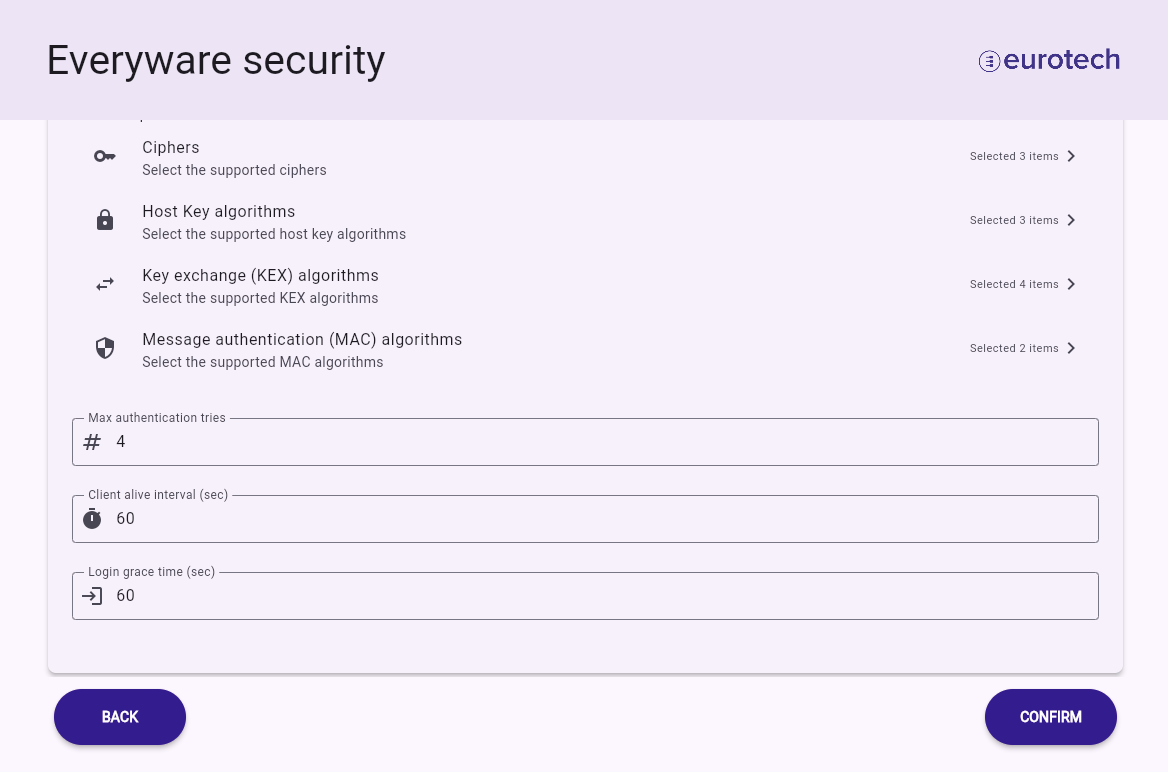
In advanced mode, users can customize various parameters for the SSH service, including the login banner, supported ciphers, host key algorithms, key exchange (KEX) algorithms, MAC algorithms, maximum authentication attempts, client alive interval, and login grace time.
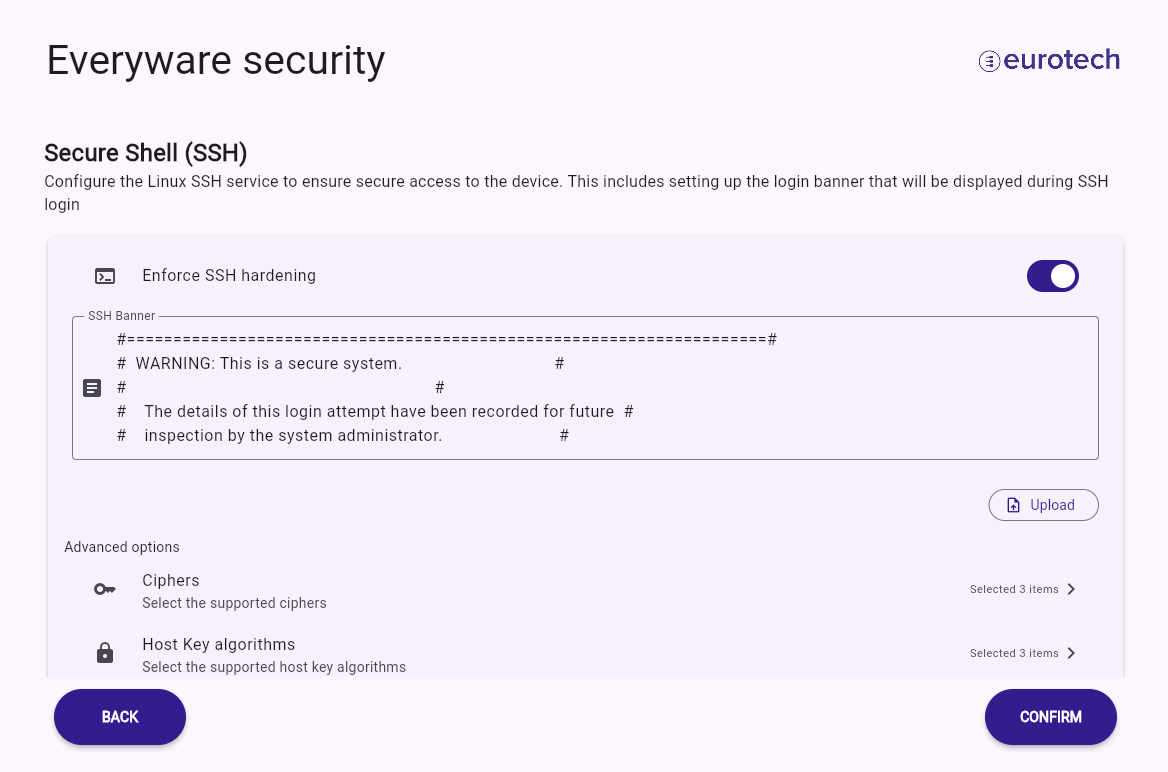
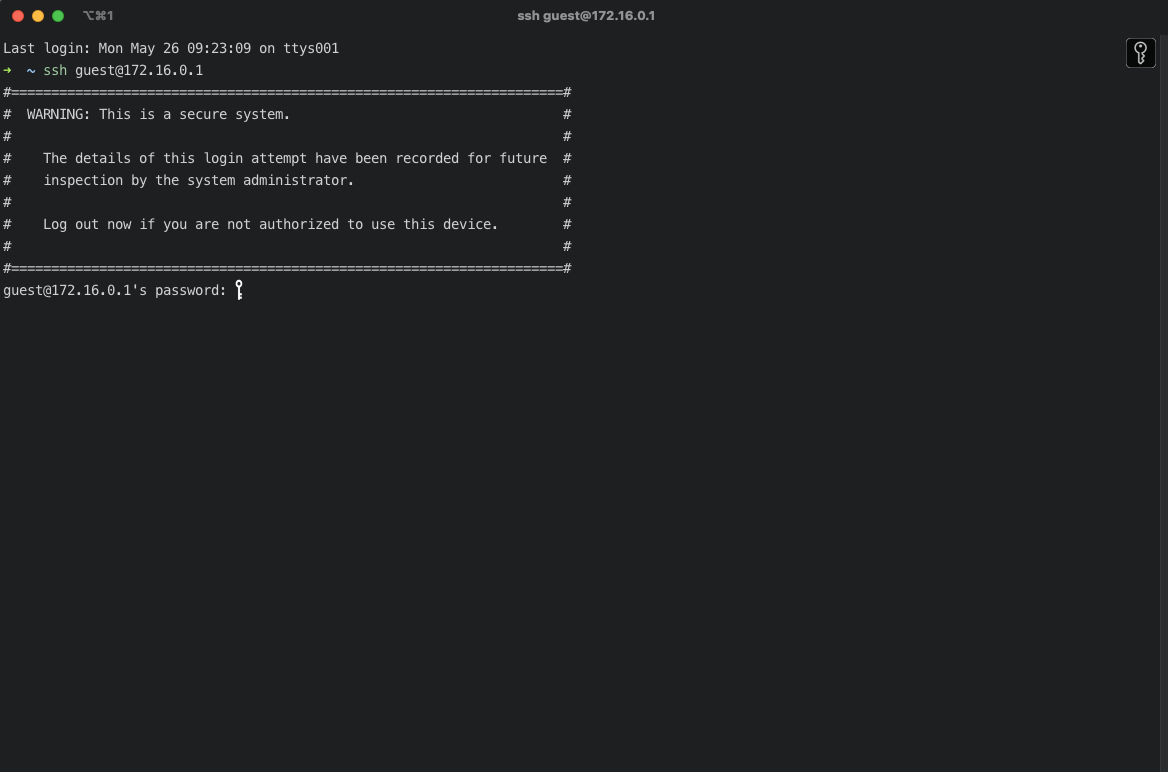
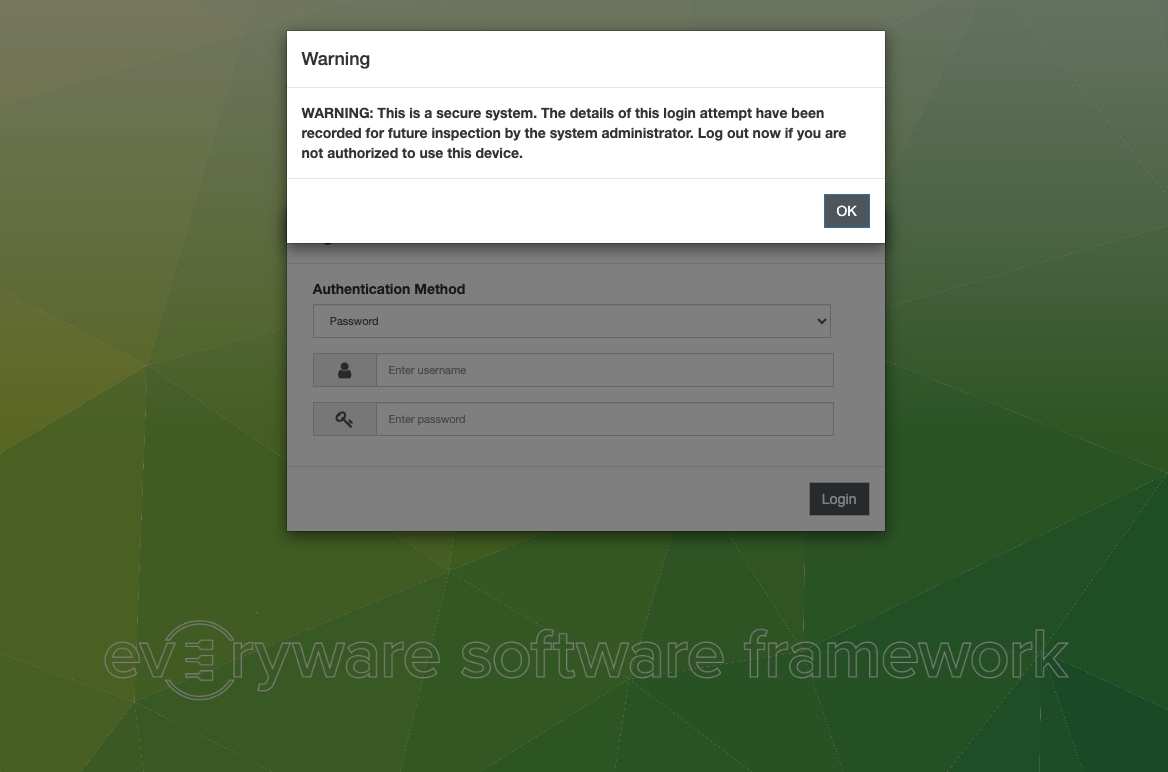
The banner appears when logging in via SSH, as illustrated below.
The default values suggested by the onboarding UI serve as the baseline for the IEC-62443 certified configuration and should be altered only if necessary.
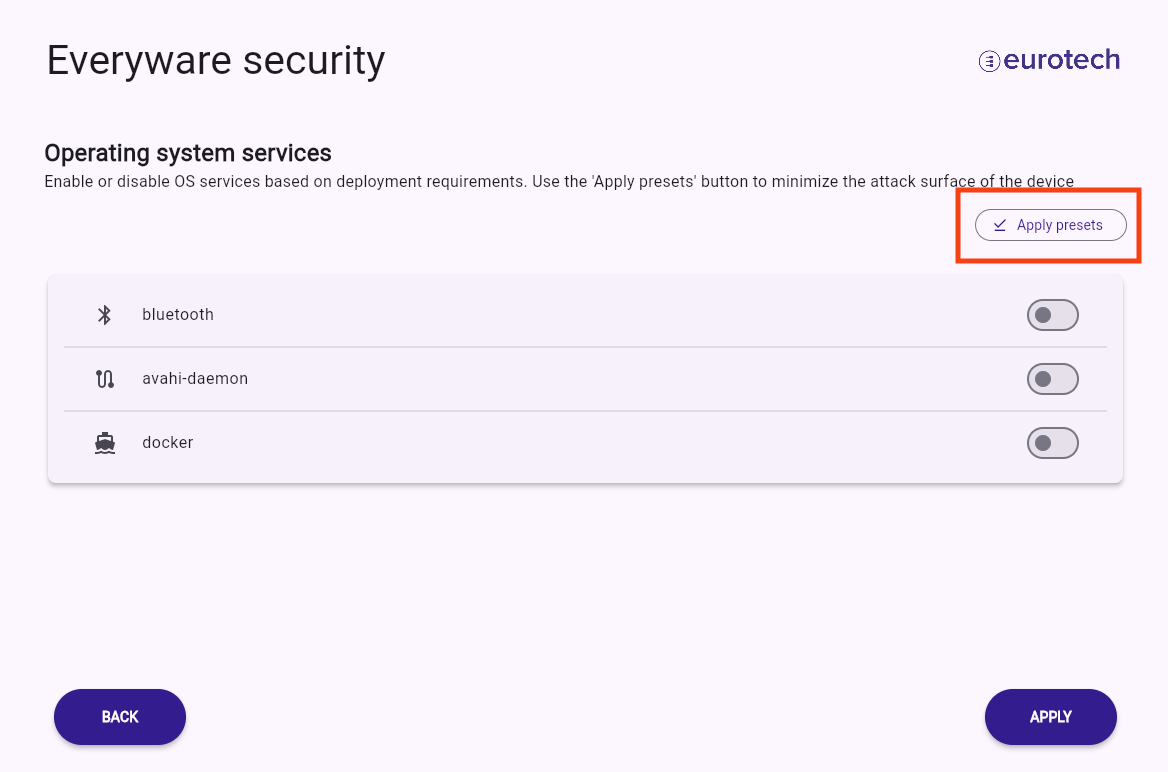
Operating System (OS) services
This section enables users to disable Linux services that could compromise the device’s security. According to the Eurotech Security manual, Linux services that are unnecessary for the defined production workflow should be disabled.
During the onboarding process, users can configure these services using an IEC-62443 preset that disables all unneeded services, thereby reducing the device’s attack surface.
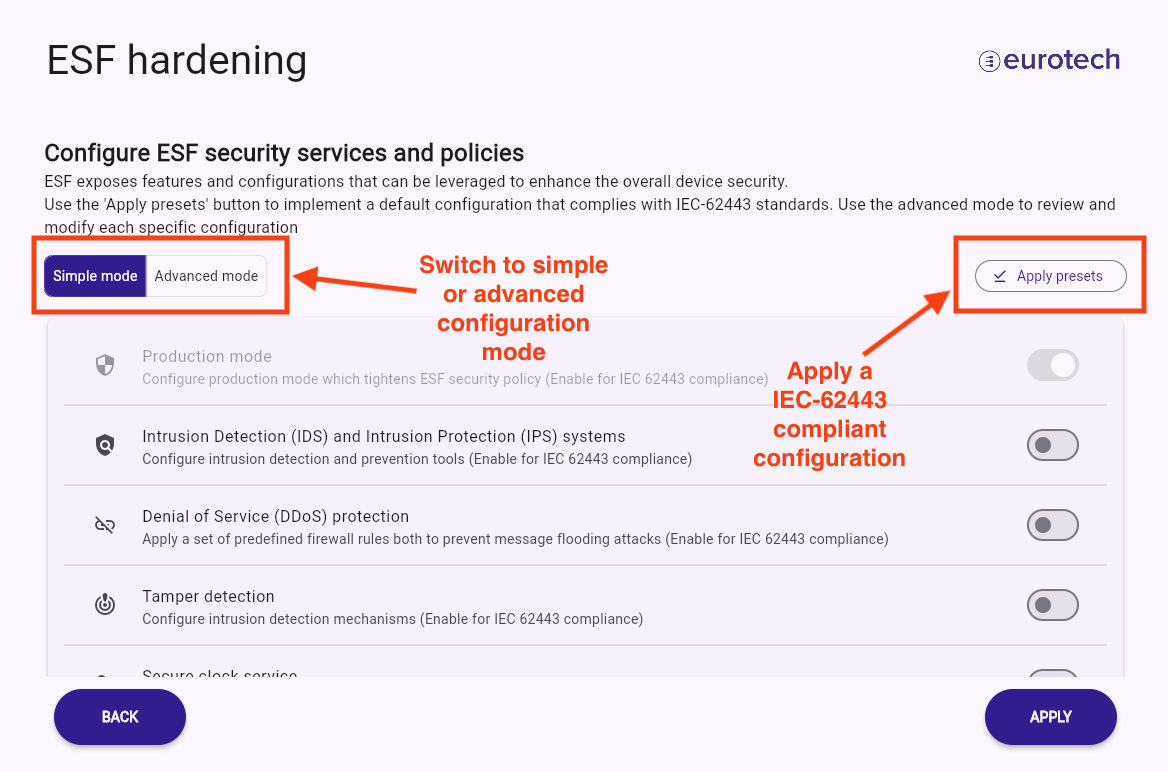
Everyware Software Framework (ESF)
The ESF hardening section allows the enabling, disabling, and configuration of ESF security-related services. Users can configure ESF services with a preset that complies with the IEC-62443 specification (see image below) or activate individual services in Simple mode. Additionally, users can further customize ESF services by switching to Advanced mode. The simple/advanced mode toggle and the apply presets button can be found in the header section of the screen, as shown in the picture below.
This section allows to configure:
-
ESF security policy: a default security policy is provided that configures ESF to operate in "production mode". More information is available on the corresponding ESF security policy documentation page. Once production mode is applied, changes cannot be reverted
-
Intrusion detection and prevention through
fail2ban, with more information available on the ESF fail2ban documentation page -
DDos protection, with additional information available on the ESF flooding protection documentation
-
Tampering detection through AIDE and Journal Forward Secure Sealing (FSS): these services detect and report unwanted changes to the filesystem and journal logs. More information can be found in the ESF AIDE intrusion detection documentation and ESF Journald FSS documentation
-
Secure clock service via Chrony: further details are available in the ESF Chrony documentation
-
Container Orchestration Service: configure ESF to manage containers with enhanced security. More information on this service is accessible here and here. The Docker service must be enabled on the Operating System (OS) services configuration page for this setting
-
Login access banner: allows configuration of a banner displayed at ESF login, as depicted below
Fields necessary for achieving an IEC 62443-compatible configuration are marked appropriately in the UI.
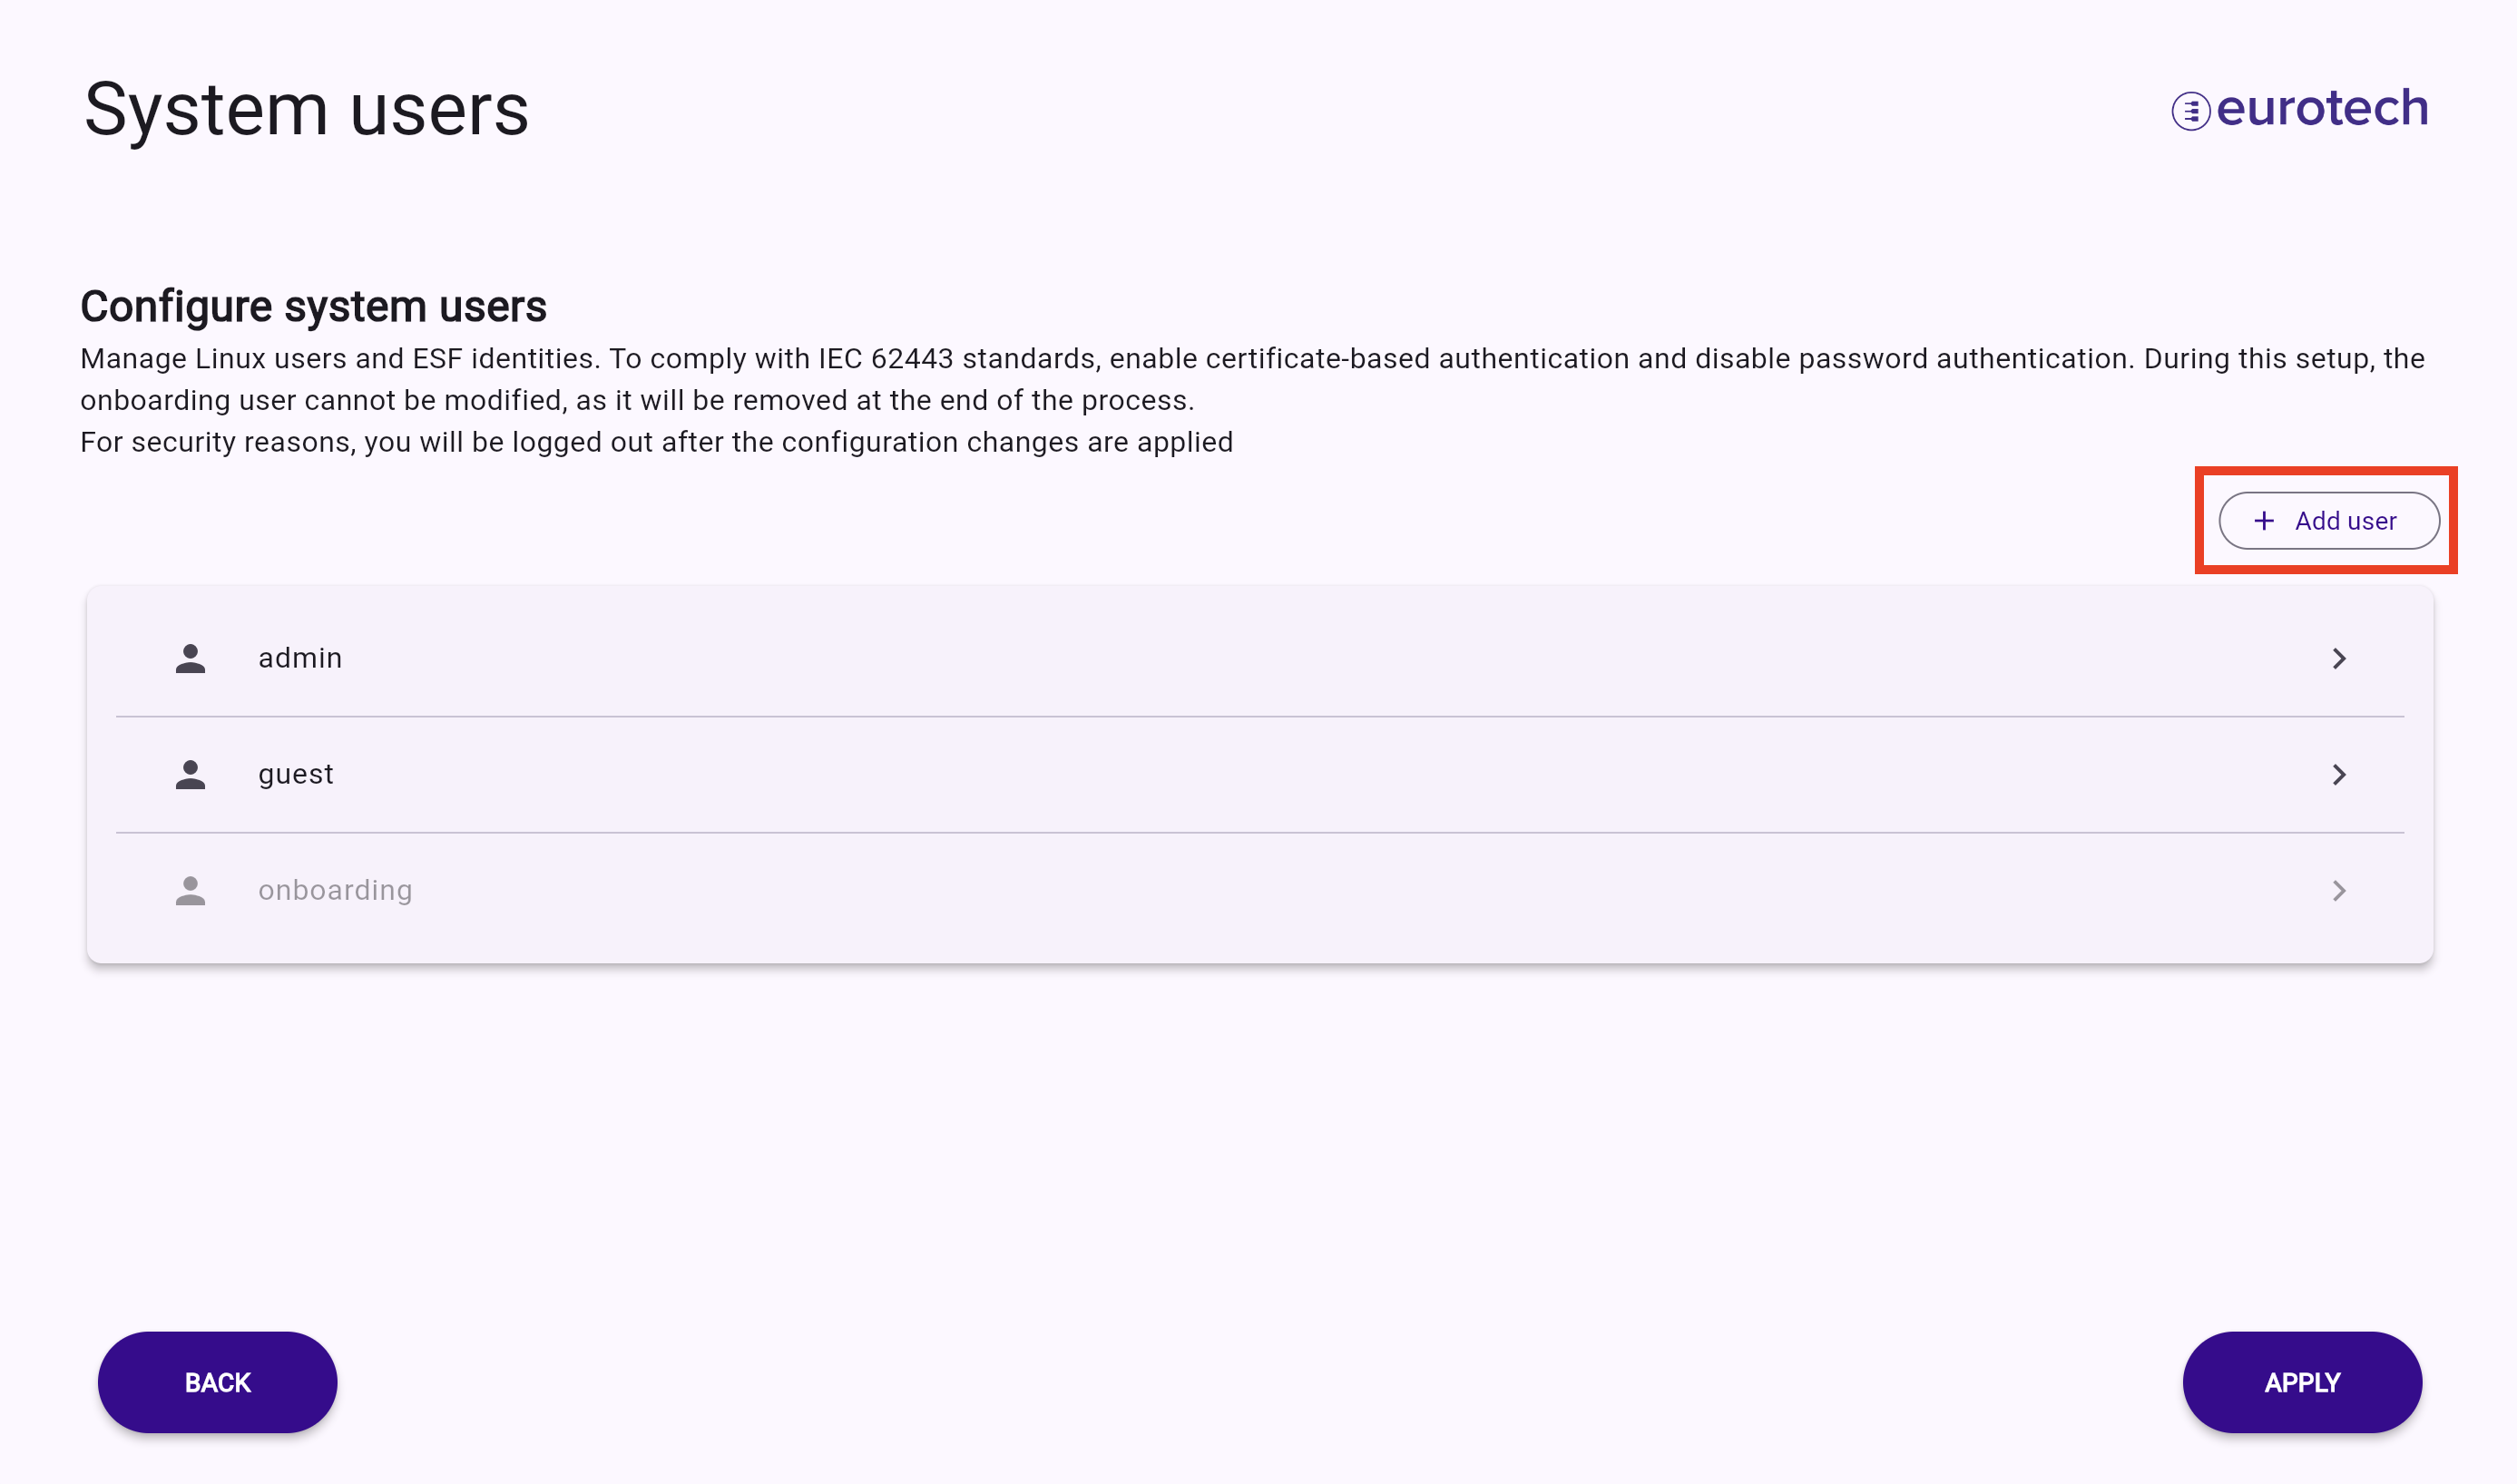
System users
Tip
System users configuration might not be available for your account if the system administrator has restricted this option.
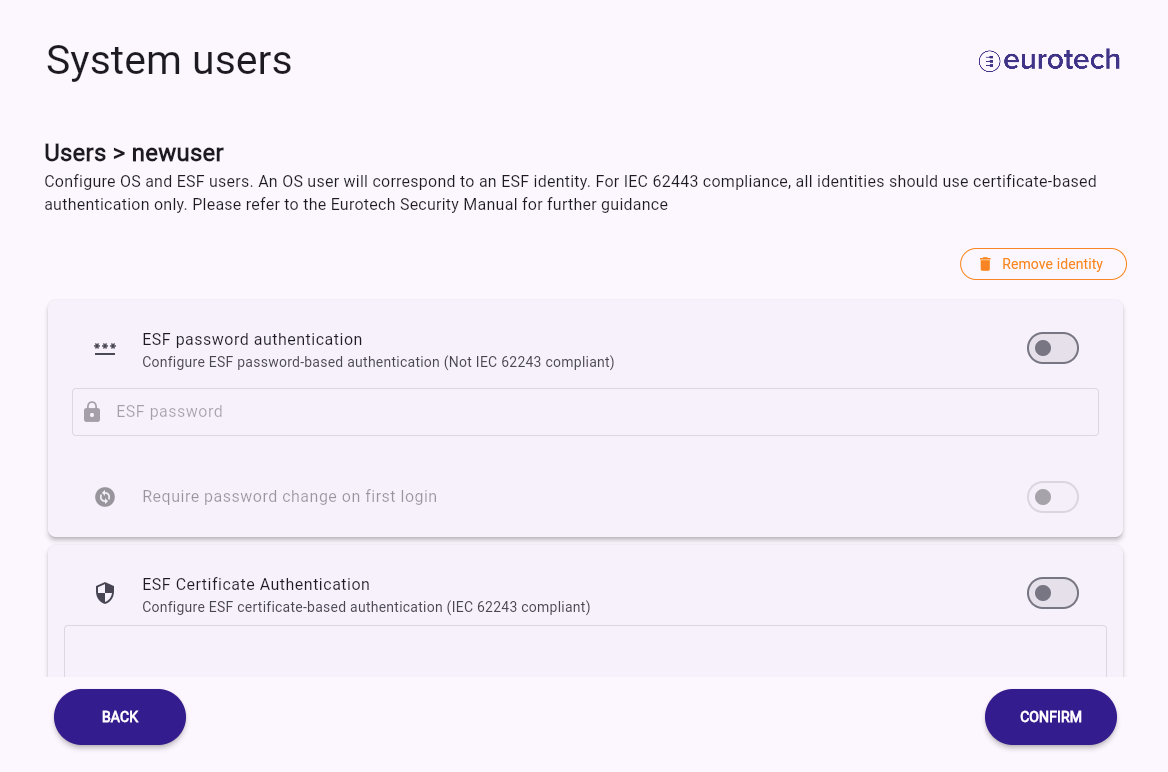
The system users section allows for the management of ESF identities and Linux users in a unified view. Each Linux user corresponds to an ESF identity.
During onboarding, users can create, modify, and remove identities. The identity onboarding is not shown in this screen, to avoid applying configurations that can lock you out of the device.
The Eurotech Security manual recommends minimizing the number of system users to reduce the attack surface, limit the scope of permissions, and enable certificate-based authentication as the preferred authentication method.
To create a new identity, use the Add user button.
A Linux user will correspond to an ESF identity, and certain requirements for the username must be met:
- The identity name must only contain characters from the following character set:
- The identity must not begin or end with the
-character - The identity name must not exceed 32 characters in length
If any of these conditions are not met, the associated Linux user will not be managed by ESF, and the configuration will not be reflected in the Web UI.
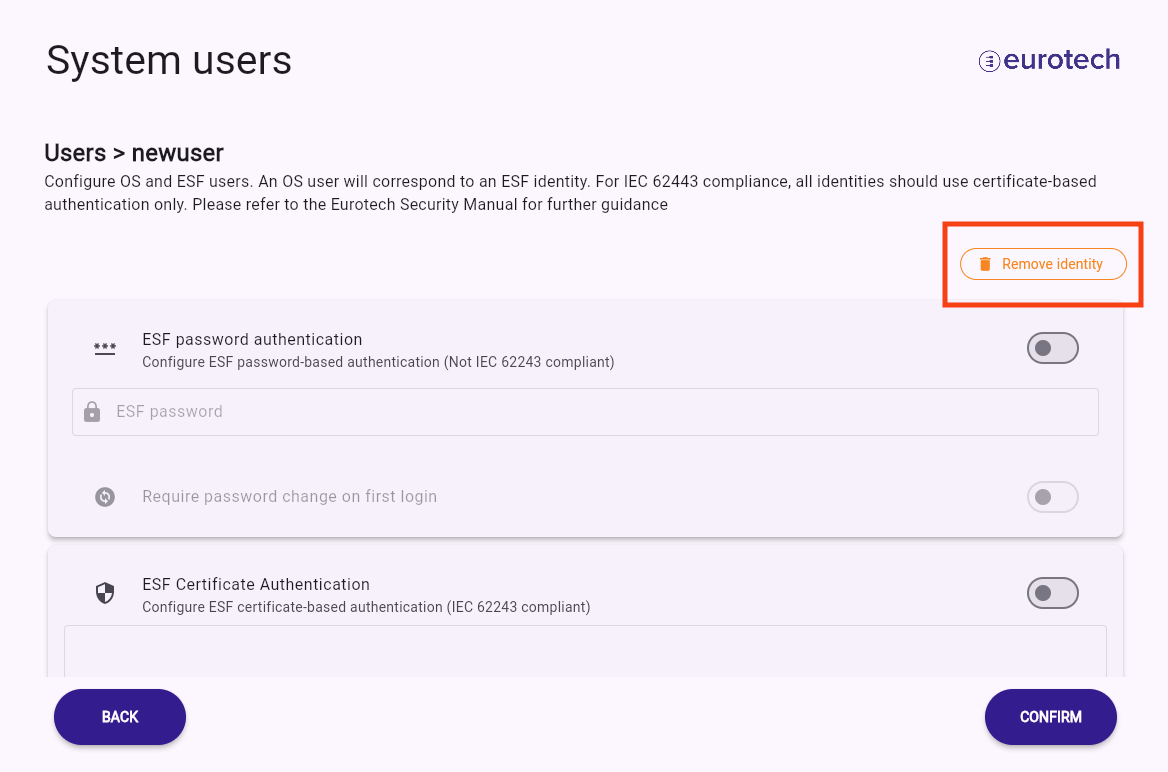
By clicking on an identity in the list, users can access the identity configuration page, where they can delete or modify the identity’s access credentials and permissions.
Various authentication mechanisms for accessing ESF services and the Linux system can be enabled. To comply with the Eurotech certified IEC 62443 configuration, each user should enable public key authentication for both ESF and Linux while disabling password authentication:
- ESF certificate authentication: enabled
- SSH certificate authentication: enabled
- ESF password authentication: disabled
- SSH password authentication: disabled
To delete the selected user, press the Remove identity button.
ESF permissions can be assigned by selecting the ESF permissions card.
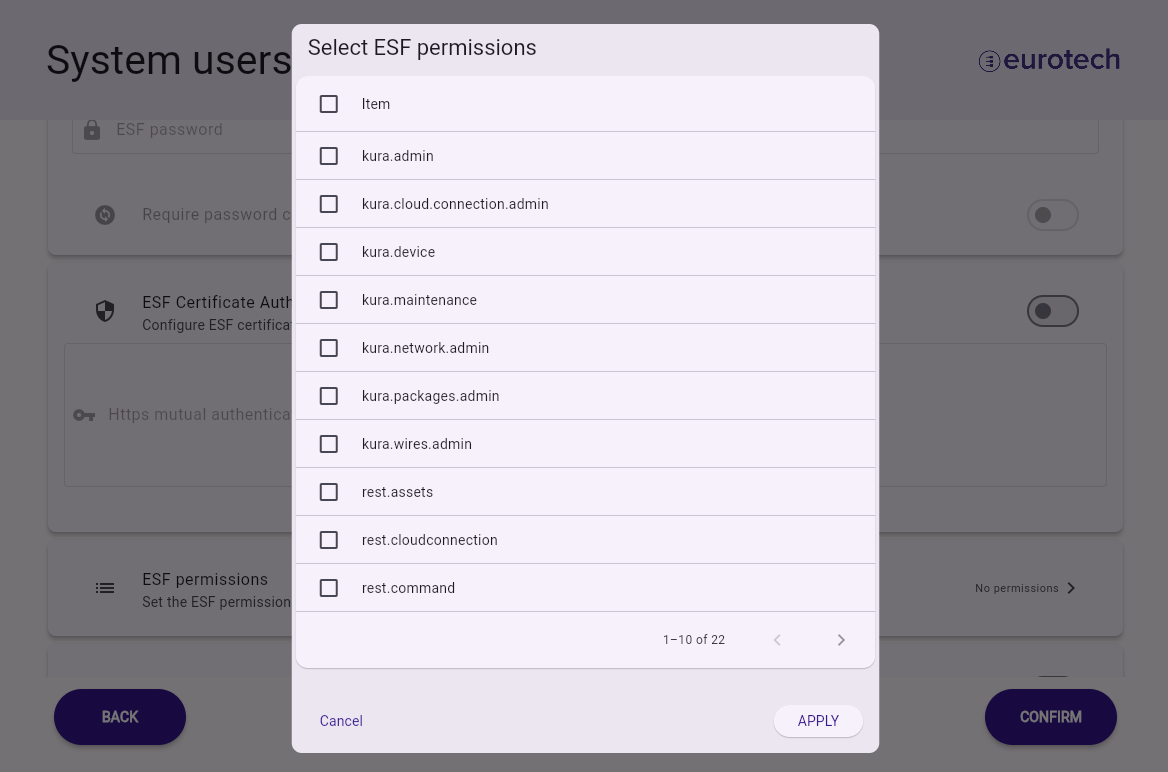
Refer to the Eurotech Security manual for the recommended set of identities and permissions to be assigned for compatibility with the IEC 62443 certified configuration.
Privileged Linux users
Creating an ESF identity using this UI will create an unprivileged Linux user that is not included in the sudoers file and has UID greater than 1000.
To have a newly created user in the sudoers group, a playbook has to be run from Everyware Cloud. How to perform updates via Ansible playbook is described in the Official ESF Documentation. The playbook can be found in the public GitHub repository eth-ansible-examples.